Here's the short answer: you can start lacto-fermenting vegetables with nothing more than a clean glass jar and something to hold your produce under the brine. Everything else—airlocks, digital scales, pH meters, temperature controllers—solves a specific problem you'll only encounter once you're a few batches in. This guide sorts the gear into three tiers so you spend money in the right order, and it maps every tool to the two safety principles that actually matter: keeping vegetables submerged and verifying sufficient acidity.
Starting Your Fermentation Journey: Prioritizing Tools
Fermentation has a way of accumulating gear. One home fermenter writing for Serious Eats admits their kitchen is "bursting at the seams with all kinds of jars, valves, lids, and various knick-knacks." But that collection grew over time. The site's own straight-to-the-point recommendation covers a scale, canning jars, airlocks, weights, a crock, pH strips or a meter, and glass bottles—yet none of that is required on day one. The trick is matching the tool to the problem you're actually trying to solve, and this guide focuses on lacto-fermented vegetables like sauerkraut and pickles, not beer brewing, kombucha, or dairy ferments.
Tier 1: Absolute Essentials for Your First Batch
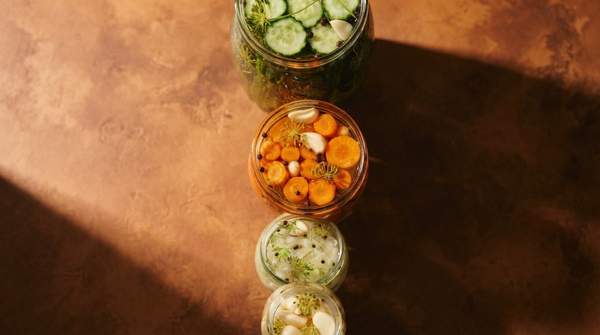
You need two things: a vessel and a weight. Any clean glass jar works, and wide-mouth canning jars are the common choice because they're affordable, come in sizes that hold everything from a small test batch to a bumper crop, and let you watch the process. As Twice as Tasty puts it, "you can see the process from top to bottom," which is genuinely useful when you're new and nervous about what's happening in there.
The second essential is a fermentation weight—glass, ceramic, or stainless steel discs sized to fit your jar. That's it. Salt and vegetables complete the picture, but the equipment bar is genuinely low. Glass jars do have quirks: keep them out of light by wrapping them in a towel or storing them somewhere dark, put a tray underneath in case of bubbling over, and be mindful of temperature swings if your kitchen runs hot or cold.
Safety Principle 1: Keeping Produce Submerged
Why does the weight matter so much? Because submersion is the core safety practice of vegetable fermentation. Vegetables that poke above the brine are exposed to oxygen, which is where mold gets its foothold. Everything below the brine sits in an anaerobic environment where the lactic acid bacteria you want can do their work.
This isn't theoretical advice. British Columbia's food safety guidance for fermented vegetables shows exactly this setup in its own recipe photos: pickles in a glass mason jar, "weighted down with a glass disc and fitted with a silicone seal that allows gas to escape." The regulator's example is essentially the beginner's kit—jar, weight, and a one-way vent. If your equipment matches that, you've covered the first safety principle before you've spent more than a few dollars.
Tier 2: Key Upgrades for Better Consistency
Once you've run a batch or two, two upgrades earn their keep. The first is an airlock lid. Airlocks let fermentation gases escape while keeping outside air from getting in, which limits airflow and reduces the need to "burp" your jars manually. Reviewers at The Ferment Guide tested the popular airlock lids specifically for beginners and experienced fermenters alike, and the pitch is consistency: fewer openings means fewer chances for contamination and less daily attention.
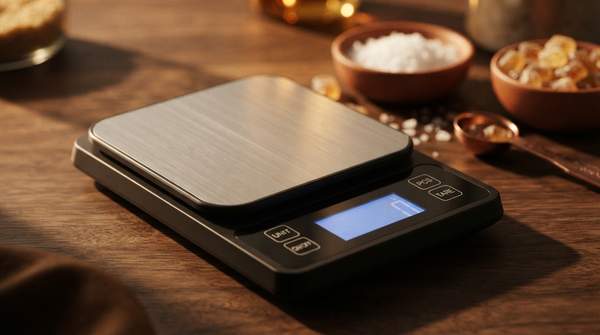
The second upgrade is a digital scale. Holly Howe of MakeSauerkraut calls hers the very first tool she pulls off the shelf, whether she's fermenting a small jar or filling a five-gallon crock. The reason is precision: a scale lets you slice the right amount of cabbage for your container and add the correct amount of salt to ensure a safe fermentation. Salt ratios are the variable most likely to make or break a batch, and measuring by weight removes the guesswork.
Safety Principle 2: Ensuring Sufficient Acidity
The second safety principle is acidity. Lacto-fermentation works because lactic acid bacteria lower the pH of the brine, and food safety guidance identifies a pH of 4.6 or below as the critical threshold for fermented vegetables—the level at which growth of harmful pathogens, including Clostridium botulinum and Listeria monocytogenes, is inhibited. Taste and smell can suggest a ferment is done, but they can't verify that threshold.
That's the gap a pH meter fills. As Twice as Tasty frames the question: "When is a pickle done fermenting? To take away the guesswork of relying on taste and smell, you can check their pH with a meter." The Ferment Guide makes the same point from a testing perspective—a pH meter takes the guesswork out of fermentation safety, with options ranging from budget pen meters to lab-grade accuracy. pH test strips are the cheaper entry point; Serious Eats recommends both strips and meters as part of a complete setup.
Tier 3: Advanced Tools for Precision and Control
The third tier is for fermenters chasing repeatability at scale. A fermentation crock is the flagship upgrade: Serious Eats highlights a Korean-style crock that comes in a wide range of sizes for everything from a small batch of pickles to a large container of kimchi, and with that design you don't even need weights—pressing down on the lid keeps ingredients submerged. Crocks also address the glass jar's weaknesses, buffering against temperature swings and containing bubbling brine.
Beyond crocks, the advanced tier is about environmental control. The Ferment Guide notes that temperature is one of the biggest variables in fermentation, and a temperature controller lets you dial it in precisely. Twice as Tasty adds smaller touches for the same problem—wool jar insulators and adhesive thermometers for tracking temperature swings—plus a kraut pounder for tamping vegetables and packing jars. None of this is required. It's for when you know your kitchen's weak spots.
Fermentation Tool Decision Framework
Here's the whole decision in one place. Each tool is placed in its tier based on its core function and the problem it solves—essentials cover the two safety principles, upgrades improve consistency, and advanced tools add precision.
| Tool | Core Function | Problem Solved | Tier |
|---|---|---|---|
| Glass jar (wide-mouth) | Primary fermentation vessel | Nothing to ferment in without it; lets you monitor visually | Essential |
| Fermentation weight | Holds vegetables under the brine | Prevents mold by keeping the environment anaerobic | Essential |
| Airlock lid | Vents gas while blocking outside air | Reduces burping and airflow-related inconsistency | Upgrade |
| Digital scale | Measures salt and produce by weight | Ensures correct salt ratio for safe, repeatable ferments | Upgrade |
| pH meter or strips | Measures acidity of the brine | Verifies pH at or below 4.6, inhibiting C. botulinum and L. monocytogenes | Advanced |
| Fermentation crock | Larger, more stable vessel | Handles big batches and temperature swings; some designs need no weights | Advanced |
| Temperature controller | Regulates fermentation temperature | Controls one of fermentation's biggest variables | Advanced |
Read the table as a purchase order, top to bottom. If a row doesn't solve a problem you've actually experienced, skip it for now.
Making Your First Fermentation Purchase Decision
Beginners should prioritize a clean vessel—jars—and a method to keep produce submerged—weights—as the absolute essentials. Consider airlocks and a digital scale as key upgrades for consistency, and a pH meter as an advanced tool for precision safety verification. That ordering follows the evidence: the submersion principle is covered by the cheapest tools, while acidity verification is the last gap to close.
Your measurable indicator of success is a completed first batch of lacto-fermented vegetables with no spoilage or off-flavors—or, if you've invested in a meter, a pH reading below 4.6. Hit either of those, and you'll know your tier-one kit did its job before you spend a cent on tier three.
Sources
- The Essential Tools You Need for Fermentation at Home — Serious Eats
- Fermenting Tools — Twice as Tasty
- BCCDC
- Best Fermentation Equipment Reviews & Comparisons — The Ferment Guide
- 5 Best Tools for Fermenting at Home — MakeSauerkraut